Transform Your Google Photos Memories Albums into Engaging Videos for Social Media Sharing: A Step-by-Step Guide
- Step 1: Choose Your Social Media Platform
- Step 2: Connect Google Photos and social media to your device
- Step 3: Browse and Select Memories from Google Photos
- Step 4: Export Memories and Start Creating
- First option, screen recording: Record the Google Photos automatically generated memories with your phone's screen recorder and share the video on social media
- Second option, Instagram Reels: Transform Google Photos Memories into Eye-Catching Instagram Reels: A Step-by-Step Guide
- Third option, TikTok creation: Seamlessly Export Google Photos Memories into TikTok Videos: A Personalized Approach
- Step 5: Add Music, Effects, and Text
- Step 6: Edit and Preview Your Video
- Step 7: Share Your Video on Social Media
- Conclusion
- Frequently Asked Questions
In the age of social media, everyone loves to share their memories and experiences with friends, family, and followers. Google Photos memories albums have become a popular way to organize and store precious moments, but did you know you can also turn them into captivating videos for your favorite social media platforms? In this step-by-step guide, we'll show you how to transform your Google Photos memories albums into engaging videos for social media sharing, helping you elevate your content game on Instagram, TikTok, and beyond!
Step 1: Choose Your Social Media Platform
First, decide which social media platform you want to create a video for. Each platform has its unique features and specifications, so it's essential to choose the one that best fits your content goals. For instance, Instagram offers Stories, Reels, and IGTV, while TikTok focuses on short, catchy videos with a range of effects and editing options.
Step 2: Connect Google Photos and social media to your device
Before diving into the video creation process, ensure that your Google Photos account and your social media apps are connected to your phone. Unfortunately, platforms don't have built-in integrations or third-party apps that can help you access your Google Photos memories albums directly from within the app, so it will be necessary to use the phone's standard sharing options.
Step 3: Browse and Select Memories from Google Photos
Once connected, navigate to your Google Photos memories albums within your Google Photos app. Browse through your albums and select the photos and memories you'd like to include in your video. Be sure to choose images that tell a story, evoke emotion, or showcase your creativity.
Step 4: Export Memories and Start Creating
After selecting your memories, export them into your phone to import them into the video editor of your chosen platform. Begin arranging the images in a sequence that tells a story or highlights the theme you want to convey. You can also trim or adjust the duration of each image to ensure your video flows smoothly.
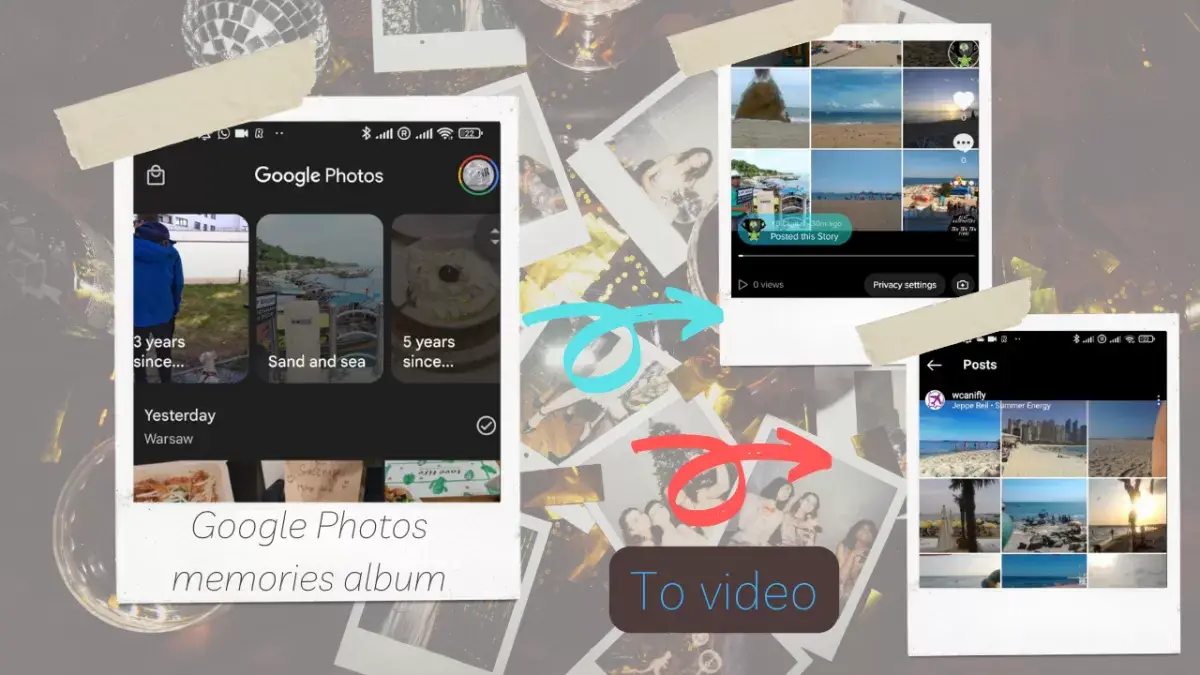
There, several options are possible to turn your Google Photos memories into engaging social media videos.
First option, screen recording: Record the Google Photos automatically generated memories with your phone's screen recorder and share the video on social media
Creating a video from Google Photos' automatically generated memories presentations for social media sharing is an excellent way to showcase your cherished moments. To achieve this, start by opening the Google Photos app and locating the memories presentation you'd like to capture. Ensure your device's screen recording function is enabled; if not, access your device's settings to turn it on.
Next, initiate screen recording and navigate back to the Google Photos app. Play the memories presentation in full-screen mode, making sure to capture the entire presentation from beginning to end. Once completed, stop the screen recording and locate the saved video file in your device's gallery.
You can then edit the video, if necessary, by trimming or adding music and captions to enhance its appeal. Finally, share your newly recorded memories presentation video on your favorite social media platforms, allowing your friends, family, and followers to enjoy a captivating glimpse into your treasured memories.
Second option, Instagram Reels: Transform Google Photos Memories into Eye-Catching Instagram Reels: A Step-by-Step Guide
To create an Instagram Reel from your Google Photos automatically generated memories presentation while retaining more control over the images, use the Google Photos sharing to Instagram Reels option to select each picture individually.
Begin by opening the Google Photos app and identifying the memories presentation you'd like to transform into a Reel. Next, tap the 'Share' button and choose the images you want to include in your Reel by selecting them one by one. Once you've made your selections, share the images directly to Instagram, which will open the app and prompt you to create a new Reel.
The selected images will appear in your Reel's editing interface, allowing you to arrange, trim, or adjust the duration of each photo according to your preference. Enhance your Reel further by adding music, text, and effects to create a captivating and engaging experience for your followers.
After perfecting your Reel, share it on Instagram with captivating captions and relevant hashtags to maximize visibility and engagement, as you showcase your treasured memories in an exciting new format.
Third option, TikTok creation: Seamlessly Export Google Photos Memories into TikTok Videos: A Personalized Approach
Transforming your Google Photos automatically generated memories presentation into a TikTok video can be an engaging way to share your cherished moments.
Start by opening the Google Photos app and selecting the memories presentation you'd like to convert. Tap the 'Share' button and choose each picture individually that you want to include in your TikTok video, giving you control over the content and narrative.
After selecting the desired images, share them directly to TikTok. If TikTok isn't listed as a sharing option, save the selected images to your device's gallery first. Then, open the TikTok app and tap the '+' icon to create a new video. Import the saved images, and TikTok will automatically generate a video or animated gallery from the selected photos.
Customize your video further with music, effects, and text overlays to create a captivating TikTok video that showcases your treasured memories in a dynamic and shareable format.
Step 5: Add Music, Effects, and Text
To make your video more engaging, consider adding music, effects, and text. Most social media platforms offer a wide selection of royalty-free music and various effects to enhance your content. Text overlays can also provide context or make your video more informative and entertaining.
Step 6: Edit and Preview Your Video
Once you've added all the necessary elements, review your video to ensure everything flows seamlessly. Adjust the timing of images, music, and text as needed. Preview your video to ensure it aligns with your vision before exporting and sharing it.
Step 7: Share Your Video on Social Media
Finally, share your newly created video on your chosen social media platform. Be sure to optimize your captions, hashtags, and descriptions for maximum visibility and engagement. Don't forget to engage with your audience and respond to comments to foster a sense of community around your content.
Conclusion
Transforming your Google Photos memories albums into engaging videos for social media sharing has never been easier. By following this step-by-step guide, you'll be able to create captivating content that resonates with your audience and helps you stand out in the crowded world of social media. So, start turning those memories into share-worthy videos today and watch your online presence soar!
Frequently Asked Questions
- What are the best practices for creating engaging video content from Google Photos Memories for social media?
- Best practices include choosing memorable photos, adding compelling narratives or music, using editing tools for visual appeal, and tailoring the content to the target social media platform.
Michel Pinson is a Travel enthusiast and Content Creator. Merging passion for education and exploration, he iscommitted to sharing knowledge and inspiring others through captivating educational content. Bringing the world closer together by empowering individuals with global expertise and a sense of wanderlust.